

Quick answer
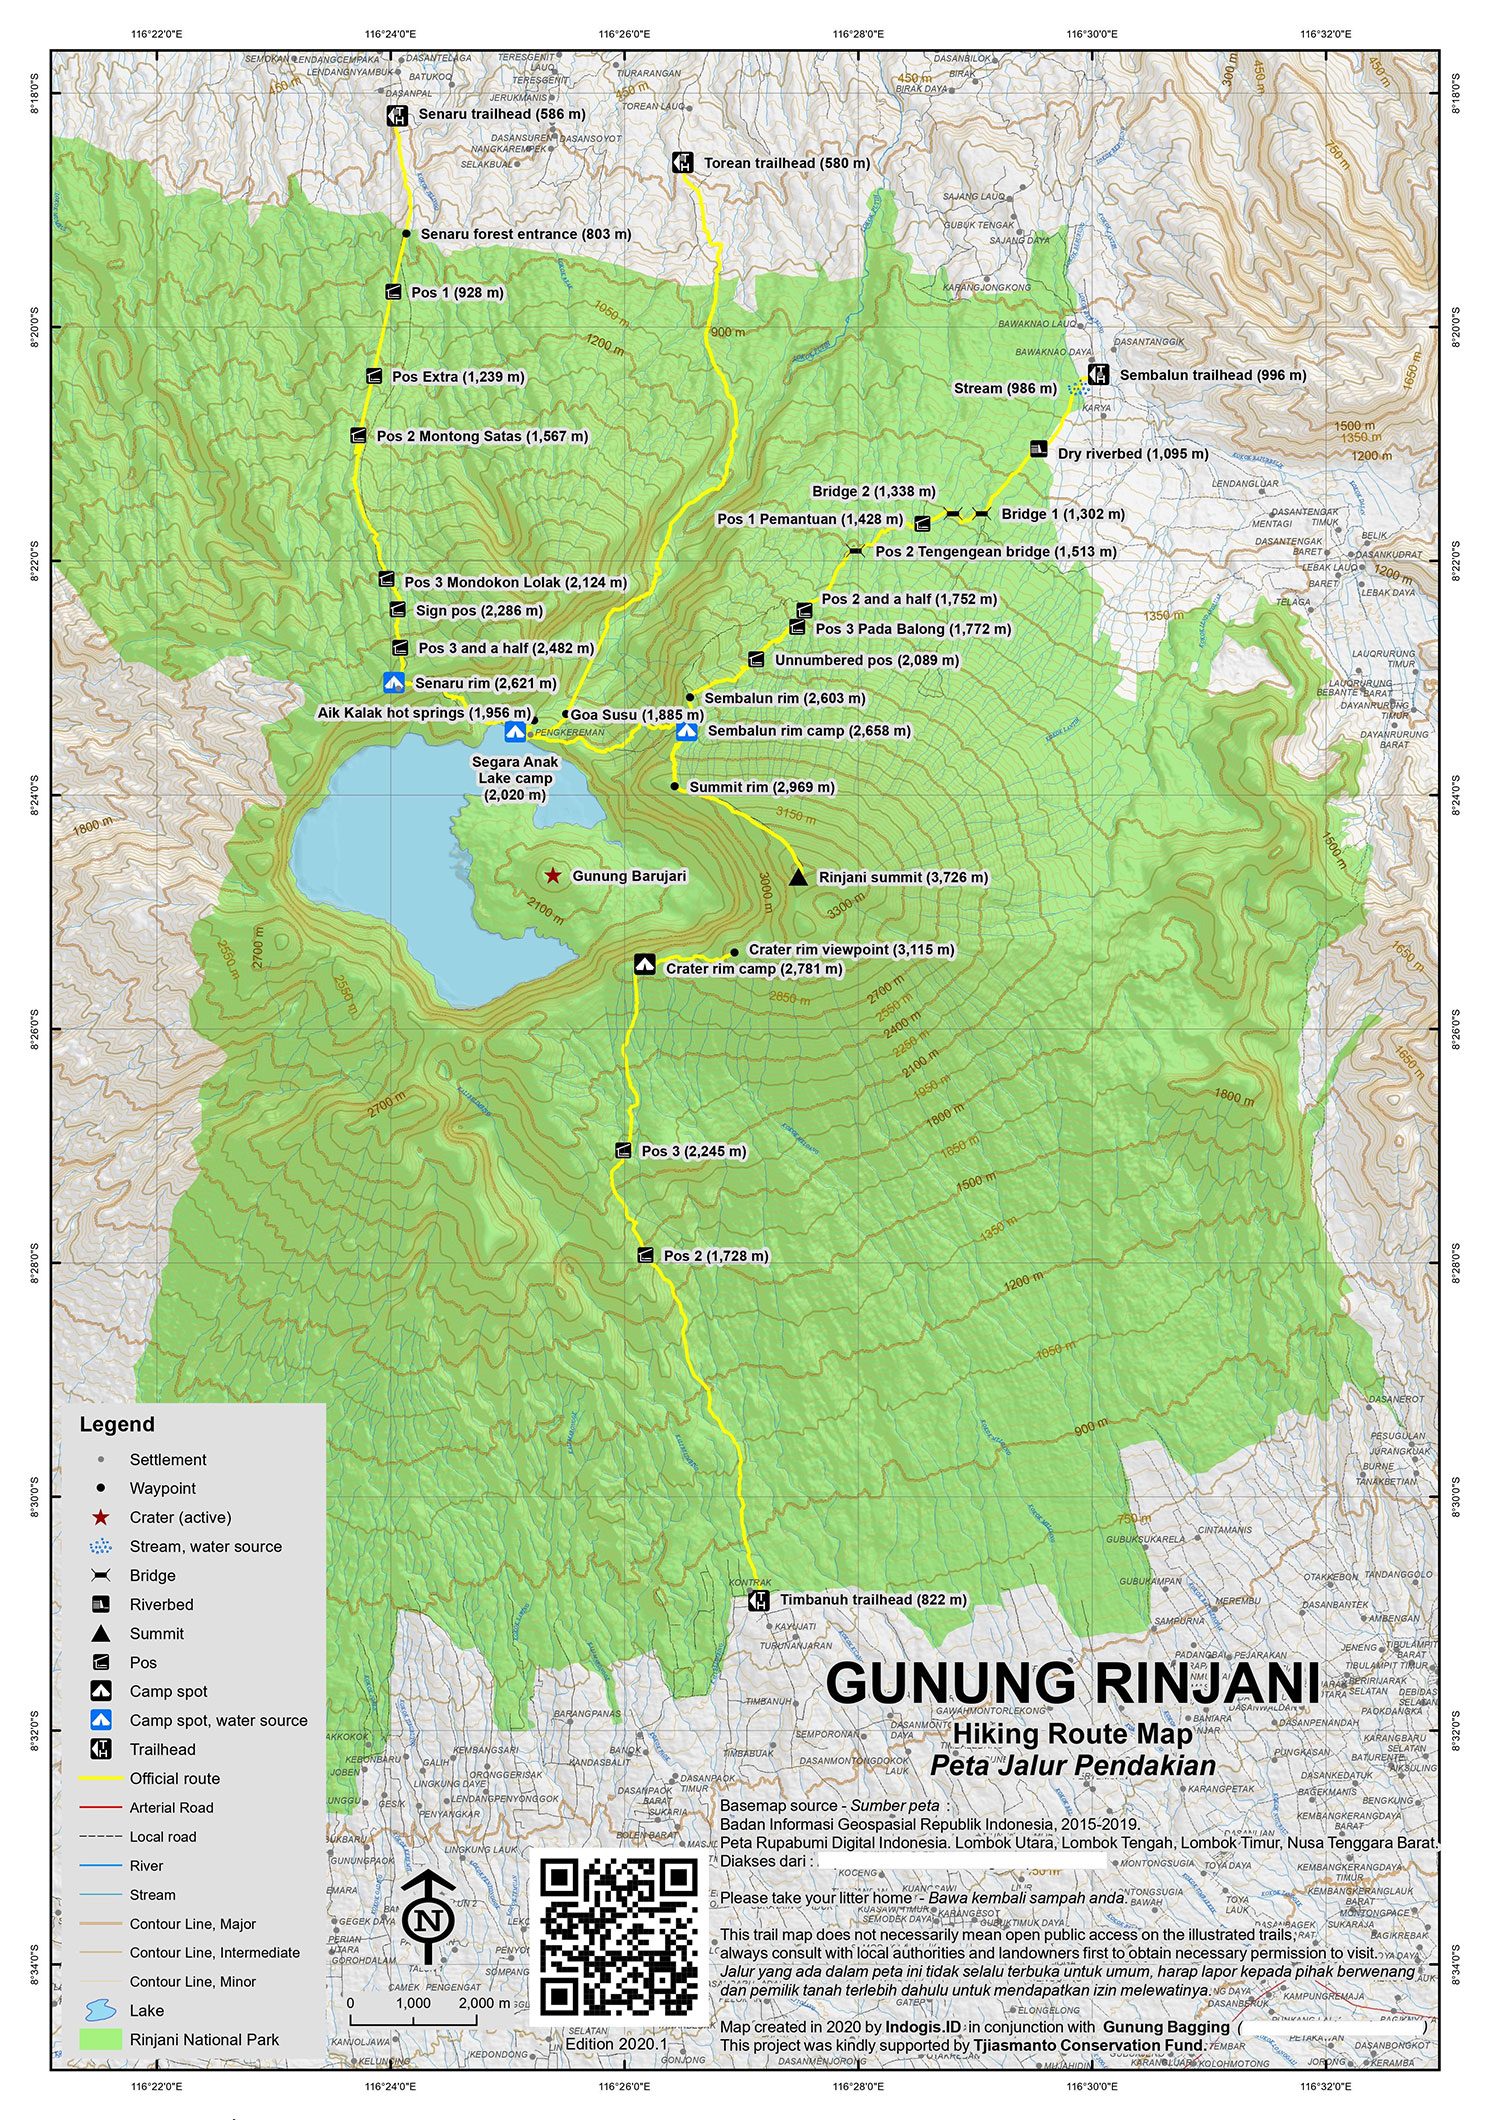
A mount rinjani trekking map guide details two main routes: the Sembalun approach (steeper, 9-10 hours to crater rim) and the Senaru route (gentler gradient, 10-11 hours). Both converge at Plawangan Sembalun crater rim before the summit push. The complete loop—Sembalun ascent, summit via Plawangan, descent to Senaru—spans three to four days with designated camping zones at Pos 1, Pos 2, Pos 3, crater rim, and Segara Anak lakeside.
Mount Rinjani's trail system divides into two primary access corridors, each originating at a different elevation and following distinct topographic lines. The Sembalun gate sits at 1,150 meters above sea level in open savanna, while the Senaru gate begins at 600 meters within montane forest. Topographic relief, vegetation zones, and water availability shift markedly between these paths, making route selection more than a matter of distance. The Sembalun corridor climbs through four designated rest posts—Pos 1 at 1,300 meters, Pos 2 at 1,500 meters, Pos 3 at 2,000 meters, and Plawangan Sembalun crater rim at 2,639 meters. Gradient accelerates beyond Pos 3 as the trail exits treeline and enters loose scoria slopes. The summit push from Plawangan adds 1,087 vertical meters over 3.5 kilometers, negotiated in pre-dawn darkness to reach the 3,726-meter peak before cloud cover obscures visibility. Descent options include retracing the Sembalun route or continuing north to Senaru, creating a traverse configuration. The Senaru approach threads through dense forest for the first six kilometers, reaching Pos 1 Senaru at 1,000 meters and Pos 2 at 1,500 meters before emerging at Plawangan Senaru crater rim (2,641 meters). This route intersects the Sembalun corridor at the rim, allowing multiday itineraries to combine both access points. From either rim position, a steep descent leads to Segara Anak, a crescent lake at 2,010 meters with hot springs at its northeastern shore. Cave formations and the active cone of Gunung Baru Jari (2,351 meters) occupy the crater floor. Navigation relies on clearly marked waypoints, ranger-staffed checkpoints, and maintained campsites at each elevation tier. Trail conditions deteriorate during the November-to-March wet season when afternoon rainfall turns volcanic ash into unstable mud. Water sources concentrate at designated posts; no reliable streams exist above 2,000 meters outside the crater. Porter services and guided treks operate under national park regulations, with all groups registered at entry gates before ascending.
“The Sembalun and Senaru routes converge at Plawangan crater rim, transforming two distinct ascents into a continuous traverse option across Rinjani's volcanic amphitheater.”
Mount Rinjani Trekking Map: How to Get to the Sembalun and Senaru Gates
Mount Rinjani National Park has two main trek gates, Sembalun on the eastern side and Senaru on the northern side, both reached by road from Lombok International Airport (Praya) or Mataram, since no rail or metro service exists on Lombok.
Lombok International Airport to Sembalun via Pringgabaya-Sapit road
Mataram to Senaru via Pusuk Pass and Bayan
Lombok International Airport to Mataram (onward transfer point)
Mandalika Terminal (Mataram) to Bayan, then local transport to Senaru gate
Bali (Padang Bai) to Lombok (Bangsal or Lembar) ferry, then road to either gate
Reading the Mount Rinjani Trekking Map: A Day-by-Day Route Breakdown
This breakdown follows the classic Sembalun–crater rim–summit–Senaru traverse over three days, the route most trekking maps illustrate with elevation contours and numbered waypoints.
Sembalun Gate to Pos 3
Begin at Sembalun village gate (1,150 m) and ascend open grassland slopes, following map waypoints through Pos 1 and Pos 2 (shelter stops) to reach Pos 3 campsite (2,639 m) by mid-afternoon—six to seven hours of steady climbing.
Pos 3 to Crater Rim
Depart before dawn for the steep scree traverse to Plawangan Sembalun crater rim (2,639 m), marked clearly on topographic maps; sunrise views over the caldera lake reward the two-hour push.
Crater Rim to Summit Optional
Strong trekkers add the three-hour return push to Rinjani summit (3,726 m), following the ridgeline trail shown on most route maps; others rest at the rim camp.
Crater Descent to Senaru Gate
Descend the western slope into forest, passing the hot springs marker (often labeled on maps near Segara Anak lake) and continuing through Pos 2 Senaru to exit at Senaru gate by early afternoon—six to seven hours total.
Key Landmarks Marked on the Mount Rinjani Trekking Map
A Rinjani trekking map is built around a handful of fixed reference points, and knowing what each one looks like on the ground makes the map easier to read before you set off. These are the named landmarks you'll see marked on nearly every route, whether you start from Sembalun or Senaru.
Mount Rinjani Summit
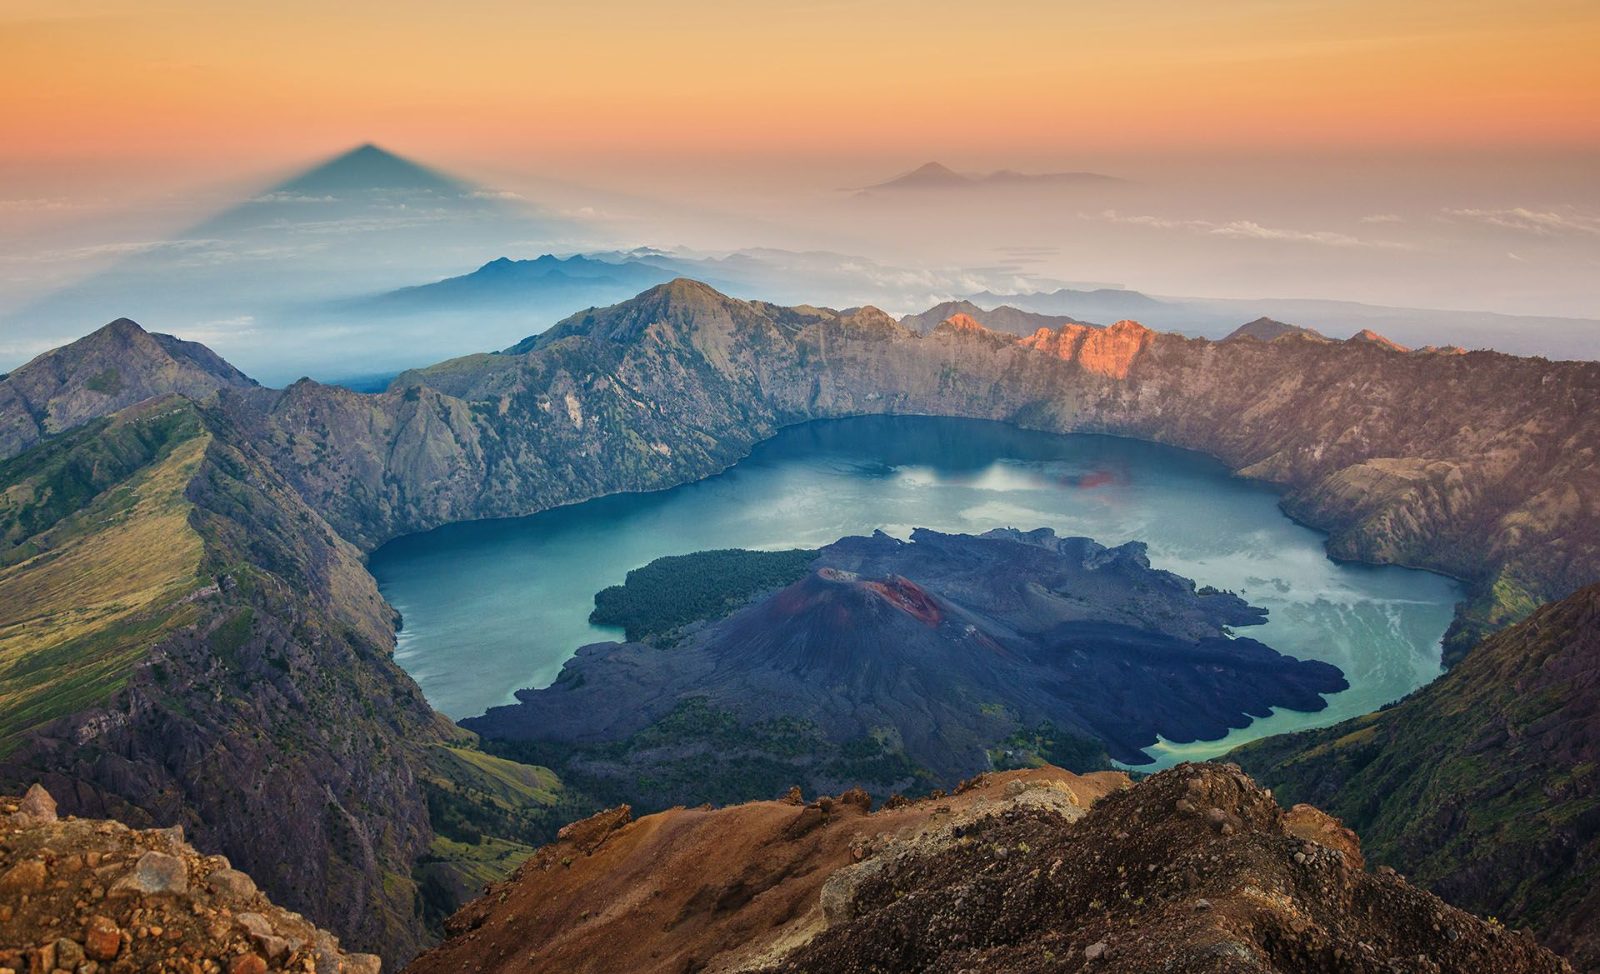
The volcano's summit sits at 3,726 meters, the highest point marked on any trekking map and the objective of the final pre-dawn push from crater rim camps.
Start the summit push around 2:00-3:00 am to reach the top near sunrise.
Segara Anak Lake
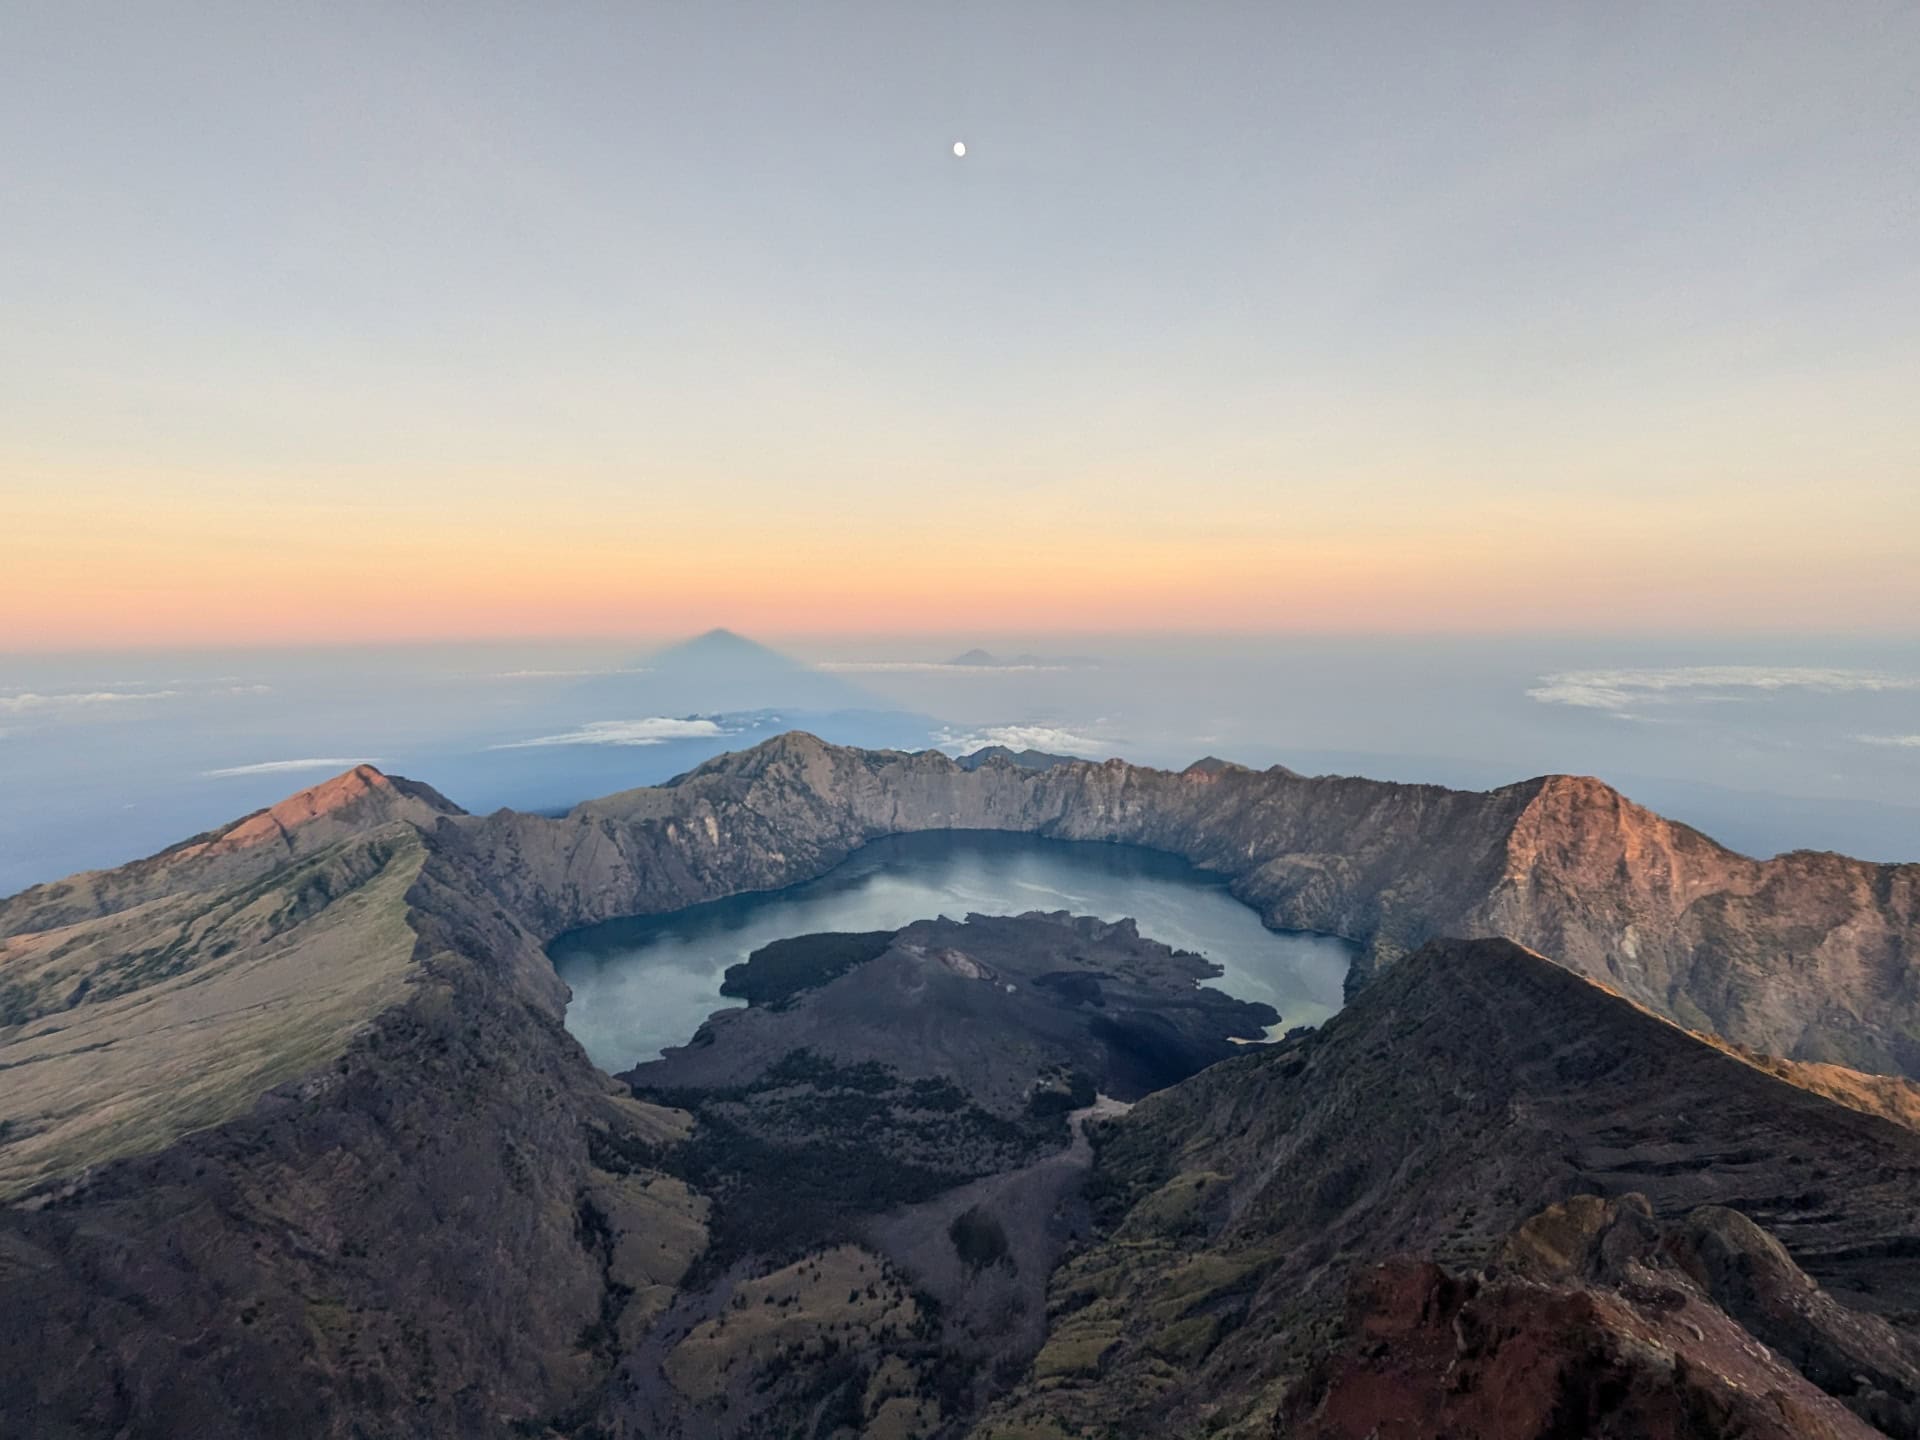
A crescent-shaped crater lake inside the caldera, fed partly by hot springs and known locally for its half-moon shape ('segara anak' means 'child of the sea').
View it first from the rim descent point before dropping down to the shoreline.
Sembalun Crater Rim
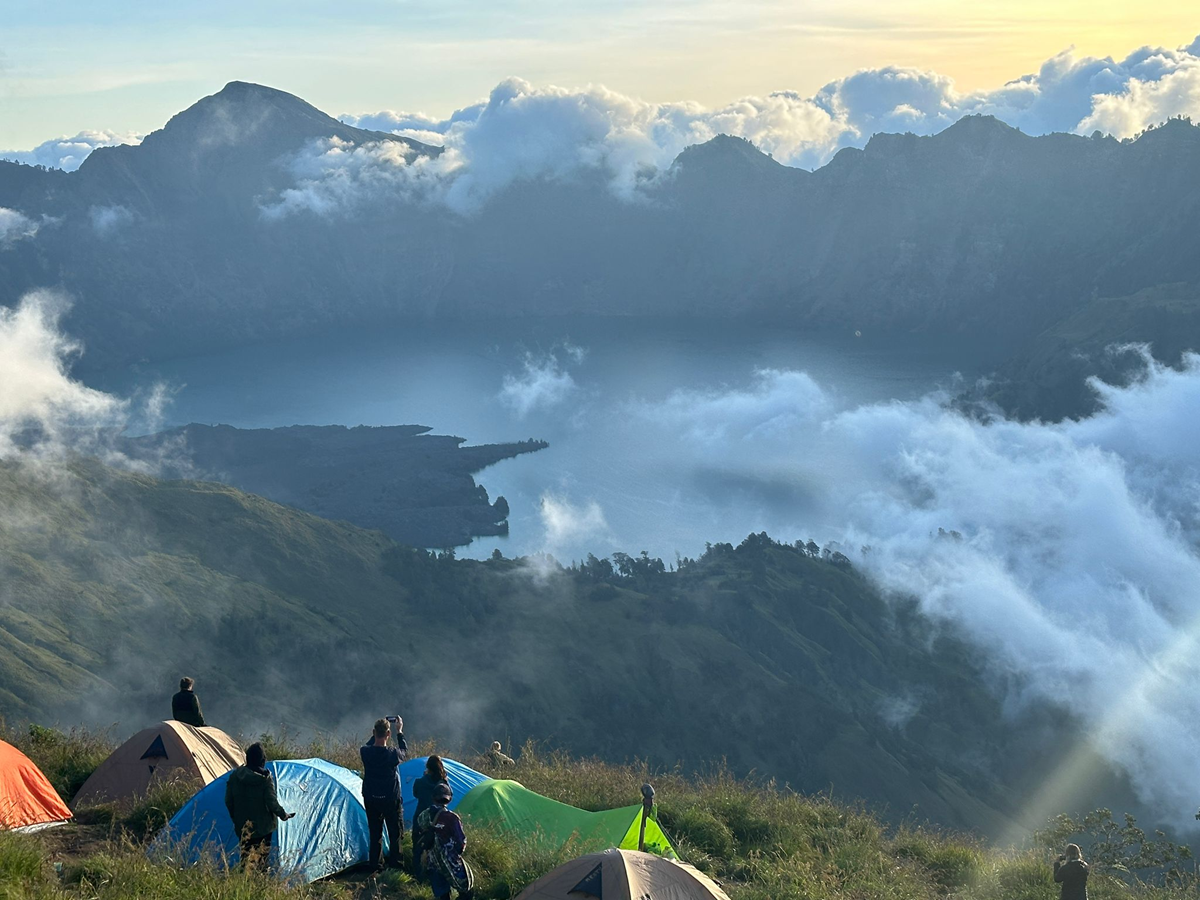
The rim viewpoint reached from the Sembalun side, marked on maps as a major camp and viewing stop with open views across the caldera to the summit cone.
Reach the rim in late afternoon for clearer views before clouds build.
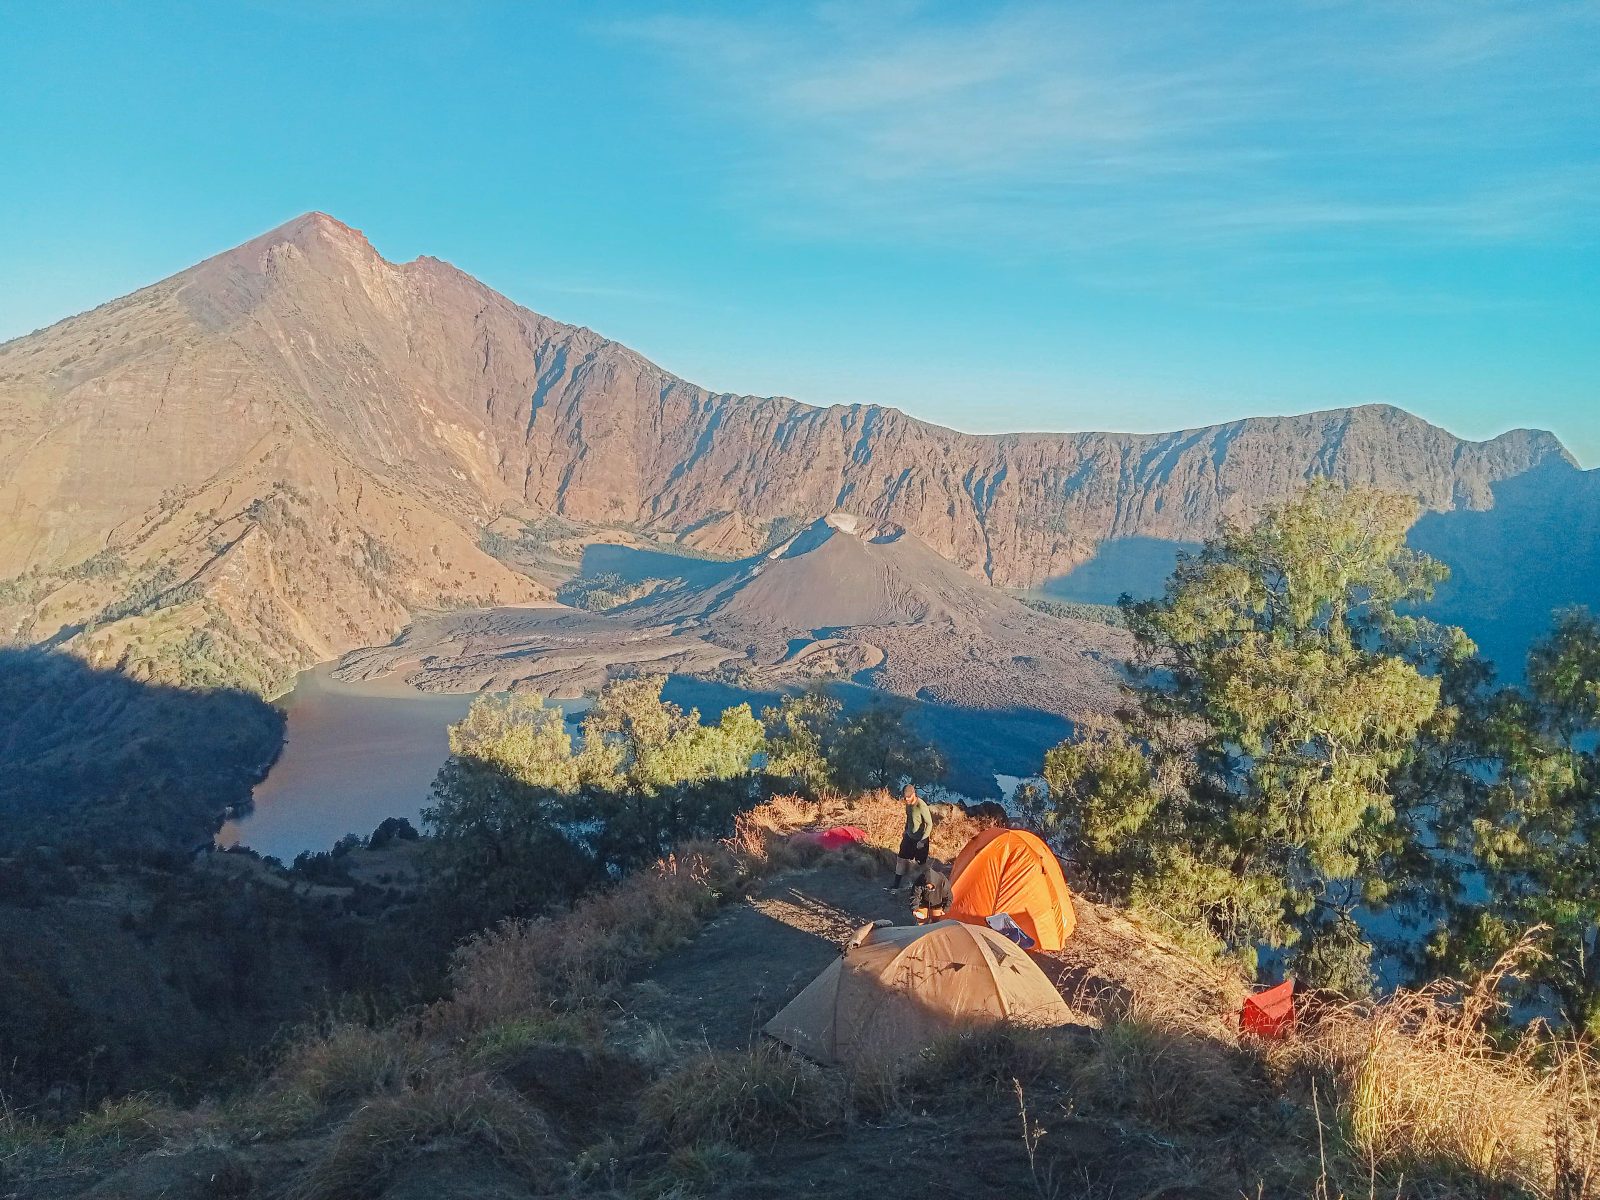
Senaru Crater Rim
The rim viewpoint on the Senaru (northern) approach, marked as the counterpart camp to Sembalun and a common map reference for routes that loop between the two trailheads.
Compare this rim's angle on the lake to the Sembalun side.
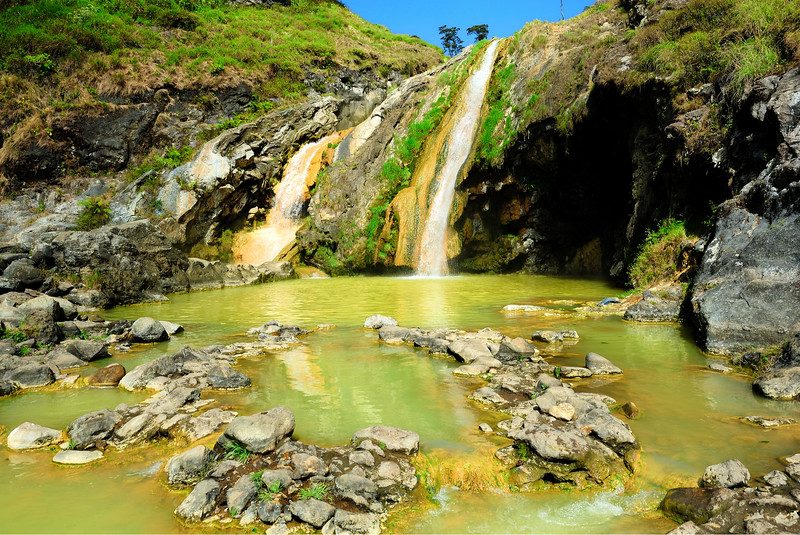
Aik Kalak Hot Springs
Natural hot springs on the shore of Segara Anak, fed by geothermal activity from the still-active Barujari cone, marked as a rest stop on lakeside map routes.
Visit midday when light cuts across the steam for clearer photos.
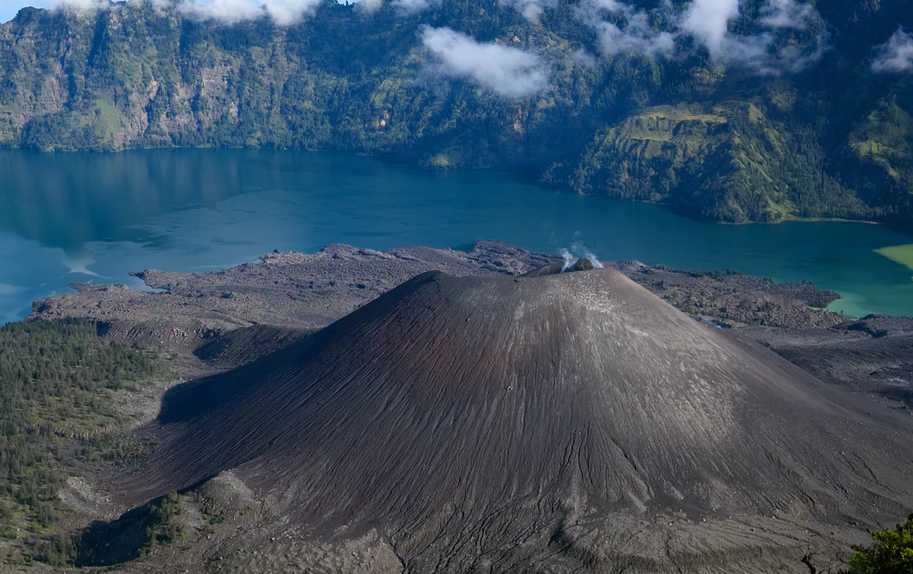
Mount Barujari
A younger, still-active cone rising from within the caldera beside Segara Anak lake, visible as a distinct marked feature on maps showing the crater floor.
Photograph it from the crater rim before descending to the lake.
Best Time to Follow the Mount Rinjani Trekking Map
The dry season, roughly April through November, is the window when trail markings and ridge lines on the trekking map are actually visible and safe to follow, and arriving at the gate between 06:00 and 08:00 keeps the crater and summit views free of afternoon cloud.
April to June
Moderate, growing through MayDry, 20-30C days, cool nights near 10C
Trails are dry and visibility is consistent, making it easier to match the map's contour lines to what you see on the ground.
July to August
Peak crowds, national park's busiest monthsDry and stable, warm days, cold nights
This is the most reliable stretch for weather, but popular waypoints on the map, like the crater rim junctions, see the most foot traffic.
September to November
Tapering, fewer trekkers by NovemberDry with rising humidity late in period
Conditions stay walkable but afternoon cloud builds faster, so the map's viewpoint markers are best reached before midday.
December to March
Park typically closed to trekkersWet, heavy rain, landslide risk
Rinjani National Park suspends trekking permits for this period most years, so the map is not usable for a live ascent regardless of season row above.
Daily 06:00-08:00 arrival
Fewer people on the trail at the gateCooler, clear before cloud builds
Starting in this window gives the best match between the map's terrain contours and actual sightlines, since cloud cover typically rolls in by early afternoon.
Mount Rinjani Trekking Map Checklist: What to Prepare Before You Go
Mount Rinjani requires mandatory guide arrangements and altitude-specific gear that your trekking map alone cannot replace.
-
Book licensed guide and porter — National park regulations require all trekkers to hire registered local guides, arranged before arrival
-
Obtain trekking permit at gate — Conservation fee of 150,000 IDR per person per day is collected at Sembalun or Senaru entry points
-
Pack warm layers for summit altitude — Temperatures drop to freezing above 2,000 meters, especially during pre-dawn summit attempts
-
Carry water purification tablets or filter — Natural water sources marked on route maps require treatment before drinking
-
Download offline map version — Mobile signal disappears beyond base camps, making digital navigation impossible without cached data
-
Prepare broken-in trekking boots — Rocky volcanic terrain and multi-day distance demand footwear tested before the trek
-
Confirm water refill points on route — Your map shows springs at Pos 1, Pos 2, and Segara Anak crater lake for planning resupply
Rules to Follow When Using the Mount Rinjani Trekking Map
Mount Rinjani National Park enforces strict trekking regulations to protect the fragile alpine ecosystem and ensure visitor safety. All trekkers must comply with mandatory guide requirements and waste management protocols when following any route on the map.
Do
- Trek only with a licensed guide from the national park authority
- Stay on marked trails indicated on your trekking map
- Pack out all waste including organic material and toilet paper
- Register at the entry gate before starting your trek
- Follow your guide's instructions regarding camp zones and water sources
- Respect sacred sites marked on the map near the crater rim
Don't
- Attempt solo trekking; independent hiking is prohibited by park regulations
- Leave marked trails to create shortcuts or explore unmapped areas
- Bury waste or leave food scraps anywhere on the mountain
- Use soap or shampoo in Segara Anak crater lake water
- Light fires outside designated camping zones shown on route maps
- Pick plants or disturb wildlife along any trekking route
Check availability
FAQ: Mount Rinjani Trekking Map
Everything you need to know about mount rinjani trekking map